Shot size is the practical “dose” of plastic your injection molding machine delivers each cycle, and on extra-large machines a small miscalculation can turn into very expensive scrap, downtime, or cosmetic defects. This article explains what shot size really includes (it’s more than the part), how to calculate it using either weight or volume, and how to sanity-check the number against barrel capacity, cushion, and residence time. If you’re producing large-format packaging components—like trays, inserts, and protective structures commonly used for premium biscuit gift packs—you’ll also see how these calculations connect to real production outcomes.
Why Shot Size Matters in 2026
Extra-large injection molding machines are increasingly used to make big, high-visibility plastic components: food-grade trays, protective inserts, display-ready retail packaging, and transport-friendly structures. The market pressure is very real—brands want premium presentation, lighter weight, and consistent cosmetics, while manufacturers want shorter cycle times and fewer changeovers. Shot size sits right in the middle of those demands because it dictates whether the machine is operating in its stable “sweet spot” or fighting physics every cycle.
On smaller presses, a shot that’s a little too large might show up as minor flashing or a little more regrind. On an extra-large machine, the same kind of error can create long residence time (material sits hot in a large barrel), broader melt temperature swings, and inconsistent fill/pack behavior across a big flow length. Those issues often appear downstream as warpage, splay, brittleness, or gate blush—exactly the kinds of cosmetic and dimensional defects that are unacceptable when the molded part is part of a consumer-facing gift product.
For companies building premium food experiences, the packaging is not an afterthought. A rigid insert that doesn’t fit, a tray that scuffs, or a lid that doesn’t seal can turn a “luxury” biscuit into a damaged, crumbled disappointment in transit. That’s why shot size calculation isn’t only a plastics topic—it’s a product-quality topic, and it affects everything from unit economics to brand perception.

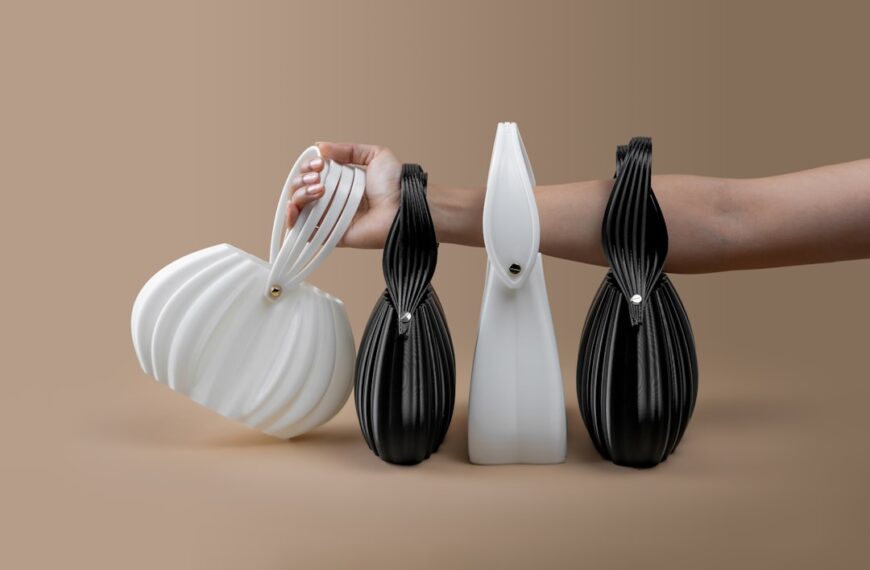
Unsplash
Core Concepts: What “Shot Size” Means on Extra-Large Plastic Machines
In injection molding, “shot size” is the amount of molten polymer the screw advances (injects) into the mold during a cycle. People often talk about shot size as “part weight,” but a usable calculation has to include the whole melt package that leaves the nozzle. That usually means the plastic in the part(s) plus the runner system (cold runner or hot runner drops), plus any expected start-up losses, with a cushion left in front of the screw for control and repeatability.
On extra-large machines, shot size also needs to be viewed through the lens of machine utilization. The goal is not simply “enough plastic to fill the mold.” The goal is to run the press in a stable operating window where the screw stroke is long enough for good metering accuracy, short enough to avoid excessive residence time and melt degradation, and consistent enough to keep weight and dimensions tight. That balance becomes more sensitive as barrel volume grows and as cycle times vary between SKUs.
Two practical definitions help align teams quickly:
- Required shot (mold demand): the plastic needed to fill and pack the part(s) and the feed system for one cycle, typically expressed in grams (g) or cubic centimeters (cm³).
- Machine shot (available/selected shot): the shot volume you set and meter on the machine, which must be higher than the required shot because you keep a controlled cushion and allow for process variation.
Implementation Guide: How to Calculate Shot Size Step by Step
There are two reliable ways to calculate shot size. One starts with weight (common on the factory floor). The other starts with volume (common in tooling and CAD discussions). Both work well as long as you convert using the correct material density and you include runner/hot-runner contributions.
Start with what you can measure: part weight and runner weight
If the tool is already running (or you have prototype parts), the fastest route is to weigh the molded output. For multi-cavity tools, weigh the full “tree” or the complete set of parts per cycle.
Step A: Determine the total molded weight per cycle.
- Total part weight (g): sum of all parts produced per cycle.
- Total runner weight (g): include sprue, runners, and cold slug wells for cold runner tools. For hot runner tools, include any cold slug at the nozzle and start-up purges if you’re estimating practical usage.
Formula (by weight):
Required shot weight (g) = Total part weight (g) + Total runner weight (g)
Step B: Convert required shot weight into shot volume (cm³) using melt density.
Machines are often rated in “shot size” by volume (cm³) or by “PS equivalent ounces,” which can confuse comparisons. Use density to stay consistent.
Formula (weight to volume):
Required shot volume (cm³) = Required shot weight (g) ÷ Melt density (g/cm³)
Density depends on polymer type and melt temperature. As a practical shop-floor approximation for common packaging resins, you’ll see melt density values around:
- PP: roughly 0.73–0.78 g/cm³ (melt), depending on grade and temperature
- HIPS/PS: roughly 0.95–1.00 g/cm³
- PET (injection grades): often around 1.20–1.30 g/cm³ (process dependent)
If you have the resin supplier’s processing guide, use their melt density figure. If not, use the best available value consistently and confirm with a short trial once you’re close.
When you’re still in design: calculate from CAD volume
If you’re quoting a new tool or developing a new packaging insert, you may have volume from CAD (or from a moldflow report). In that case, you can calculate shot volume directly and then convert to weight.
Step A: Determine the volume per cycle.
- Part volume (cm³): volume of all parts per cycle.
- Runner volume (cm³): volume of the feed system. For hot runners, runner volume might be close to zero per cycle, but you still consider the melt channel volume for residence-time checks.
Formula (by volume):
Required shot volume (cm³) = Total part volume (cm³) + Total runner volume (cm³)
Step B: Convert to weight using melt density (or solid density if you’re aligning with part weight estimates, then verify).
Formula (volume to weight):
Required shot weight (g) = Required shot volume (cm³) × Melt density (g/cm³)
Add the cushion and process allowance (the step people skip)
Required shot is what the mold consumes; it’s not what you should meter as your machine shot. You typically want a stable cushion (a small amount of melt left in front of the screw at the end of pack/hold) so the machine can control pressure consistently without bottoming out the screw. On extra-large machines, cushion matters even more because the system stores more energy and small control errors can become visible part-to-part variation.
A common working target is a cushion that equates to roughly 5–15% of the required shot volume, adjusted for part geometry and gate style. Thin-wall, high-speed packaging often benefits from a more deliberate cushion strategy because fill dynamics are sensitive.
Formula (machine shot estimate):
Machine shot volume (cm³) = Required shot volume (cm³) × (1 + Allowance)
Where Allowance is typically 0.05–0.15, depending on stability needs and machine behavior.
Check the number against the machine’s recommended shot utilization window
Extra-large presses can physically shoot enormous volumes, but that doesn’t mean every shot size is healthy. The practical question is where your machine shot falls relative to the barrel’s maximum shot capacity and the screw’s working stroke. Many processors aim to run within a mid-range band to preserve consistency and avoid degrading material.
As a rule of thumb, you’ll often see recommendations such as keeping the actual shot (including cushion) somewhere around 20–80% of the machine’s rated shot capacity. The exact window depends on the machine design, screw, resin sensitivity, and cycle time. The point is to avoid extremes: tiny shots in huge barrels can lead to long residence time and thermal degradation; near-max shots can limit cushion and stability.
A worked example: a premium biscuit tray insert on an extra-large press
Imagine a food-grade polypropylene (PP) tray insert designed to protect assorted biscuits in a gift box. The tool produces one large insert per cycle plus a small alignment clip, and it uses a cold runner.
You run a short trial and measure:
- Insert + clip weight per cycle: 420 g
- Runner/sprue weight per cycle: 80 g
- Required shot weight: 500 g
You select a melt density estimate for PP at process conditions of 0.75 g/cm³.
Required shot volume: 500 g ÷ 0.75 g/cm³ = 667 cm³
You want a cushion/allowance of 10% for stable control on a large press running multiple SKUs.
Machine shot volume target: 667 cm³ × 1.10 = 734 cm³
Now you compare 734 cm³ to the machine’s rated shot capacity and confirm that the planned screw stroke leaves a controllable cushion. If the press is massively oversized (say, rated for several thousand cm³), you may decide to move to a smaller press, change screw/barrel configuration, or adjust production planning to reduce residence time risk—especially important for food-contact parts where odor and discoloration are unacceptable.
Best Practices for Dialing In Shot Size on Extra-Large Plastic Machines
Once the math is done, the real-world success comes from how you use the number. Large presses have more thermal mass, more melt volume, and often more complex hydraulics/servo behavior. The following practices help keep shot size from being a “paper calculation” and turn it into consistent production.
Use shot size to manage residence time, not just fill
Residence time problems are common when an extra-large press runs a relatively small mold. The material sits in the barrel longer, which can lead to yellowing, odor, splay, or brittleness—problems that show up fast in consumer packaging. If you’re making premium biscuit packaging components that sit close to aromatic products (butter, cocoa, nuts), odor contamination is particularly painful because it’s noticed immediately when the box is opened.
When you see these symptoms, the fix often isn’t “tweak temperatures.” It’s more structural: right-size the press, adjust cycle time planning, consider a smaller screw/barrel, or run a multi-cavity arrangement that increases shot utilization without compromising quality.
Confirm shot consistency with a simple weight study
Even with perfect calculations, the machine and mold can introduce variability. A quick study—pulling parts across a run and checking net weight—tells you whether your cushion and transfer point are stable. On large-format parts, you can also weigh different regions (or check thickness/warp) to understand whether the process is packing evenly.
If weight drifts with time, suspect check-ring wear, inconsistent decompression, or temperature control swings. These issues matter more on large machines because the volume of molten polymer amplifies small mechanical changes.
Be conservative with sensitive resins and high-appearance parts
Some polymers are more sensitive to heat history than others. When the molded component is cosmetic—like a clear lid, a glossy insert, or a logo-embossed element for a gift presentation—melt stability becomes a brand standard, not just a technical standard. Keeping shot utilization in a stable range and avoiding unnecessary heat soak reduces the risk of haze, streaks, or flow marks that cheapen the look of a premium box.
Align shot size with packaging performance requirements
For food brands, the “plastic part” is rarely a standalone product; it’s part of an experience. A tray that flexes too much can crush biscuits. An insert that shrinks unpredictably can rattle during shipping. A lid that warps can compromise freshness. Shot size influences packing pressure, shrink behavior, and warp because it governs how the melt fills and how pressure is applied before freeze-off.
When packaging is developed alongside the food product—as it often is for seasonal gift boxes—teams can save months by treating shot size as a design input. The part design (ribs, wall thickness transitions, gate location) and the planned shot utilization should make sense together.
Document the shot “recipe” per SKU and treat it like a quality parameter
In a multi-SKU environment, operators may move molds between presses based on availability. When the shot size calculation is documented clearly—required shot, target machine shot, cushion range, and the density assumption—you reduce the risk of someone “eyeballing” the setup. That documentation becomes especially valuable for seasonal runs, where a tool might sit idle for months and then return for holiday production.
Gourmet Biscuit Creations Ltd. Introduction
1. Gourmet Biscuit Creations Ltd. – Premium Biscuit Manufacturing With Packaging-Ready Discipline
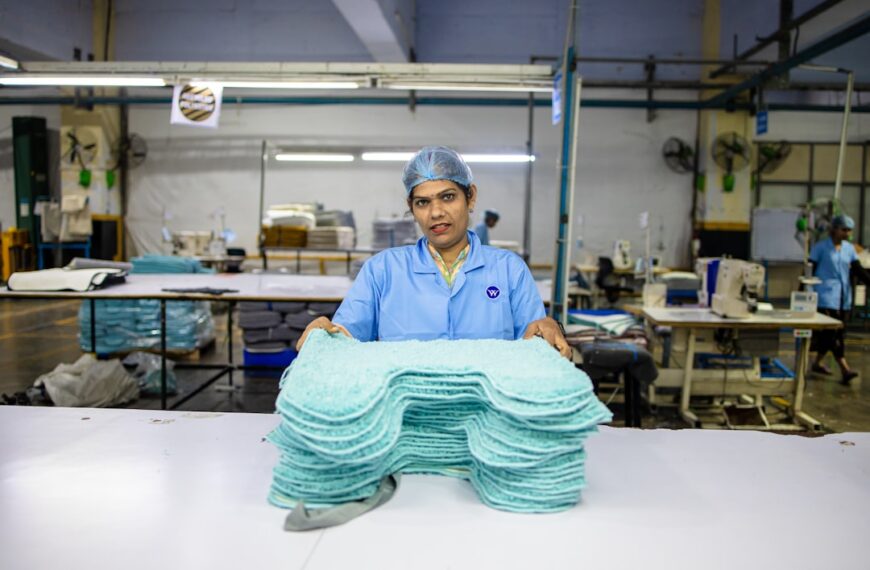
Gourmet Biscuit Creations Ltd. is built around high-end biscuit manufacturing and bakery brand incubation, supporting products from concept to launch with a strong foundation in standardized food safety management, flexible capacity, and traceable supply systems. While our name is synonymous with butter-forward shortbread, chocolate chunk cookies, oat-and-nut biscuits, and seasonal gift boxes, the operational reality is broader: premium biscuits only stay premium when the packaging protects flavor, texture, and presentation through storage and distribution.
That’s why our teams work closely with packaging partners and co-manufacturing ecosystems—often across the UK and Europe, and for international programs serving North America and Asia—to align food-grade requirements, logistics constraints, and consumer unboxing expectations. When a partner’s packaging program relies on injection-molded components (trays, inserts, caps, dividers, protective structures), understanding process fundamentals like shot size helps prevent delays and protects quality at scale.
In practical terms, we bring a “manufacturing mindset” to what many brands treat as creative work. A holiday gift box might look simple on a mood board, but once it goes into production it becomes a system: biscuit fragility, aroma protection, allergen labeling space, pack-out speed, and transit vibration all interact. If the molded insert is inconsistent because the press is operating outside a stable shot window, the biscuits arrive chipped or the presentation shifts inside the box. Those are the kinds of issues we aim to avoid early—during design reviews and supplier qualification—rather than discovering them after thousands of units are packed.
Our advantage comes from combining product development with repeatable process control. We maintain consistent parameters in key steps of biscuit production (dough temperature, moisture, bake curves), and we apply the same discipline to packaging interfaces: dimensional fit, barrier performance, and batch-to-batch consistency. For B2B customers—private label buyers, café and hotel partners, corporate gifting teams—this reduces unpleasant surprises when scaling from pilot to peak-season volumes.
Gourmet Biscuit Creations Ltd. is a strong fit when you’re building a premium biscuit line that needs both flavor differentiation and delivery reliability. That includes retailers that require stable supply, emerging brands validating a concept in smaller runs, and corporate programs that need custom presentation (logo embossing, tailored assortments, story-driven gift packaging) with dependable lead times. When injection-molded packaging is part of your product story, we help you ask the right questions—shot size, material selection, food-contact compliance, transit durability—so the final customer experience stays crisp, intact, and unmistakably premium.
Conclusion and Next Steps
Calculating shot size on extra-large plastic machines comes down to a clear sequence: determine the total plastic required per cycle (parts plus runners), convert between weight and volume with a realistic melt density, add a cushion allowance that supports stable control, and confirm the result sits in a healthy utilization range for the press. The calculation itself is straightforward; the value comes from using it to prevent the common large-press problems—residence time degradation, inconsistent packing, cosmetic defects, and warped parts.
When the molded component is part of premium food packaging, the stakes are higher than scrap rate. A tray that doesn’t hold shape or a lid that fails to protect aroma can erase the work that went into recipe development, ingredient selection, and gift-worthy presentation. Treating shot size as a design-and-process input helps packaging partners run predictably and helps food brands deliver a consistent unboxing experience.
If you’re developing or scaling premium biscuit products that rely on molded packaging—whether that’s a seasonal gift box insert or a retail-ready protective tray—Gourmet Biscuit Creations Ltd. is worth considering as a partner who understands both the food side and the manufacturing discipline that keeps quality stable at volume. You can bring us an existing packaging concept for review alongside product requirements, or involve us earlier so the biscuit format, pack-out flow, and packaging specifications mature together.
Frequently Asked Questions
Q: How do I calculate shot size if I only know the part weight?
A: Add the runner/sprue weight per cycle to the total part weight per cycle to get the required shot weight. Then convert that weight to volume using melt density (cm³ = g ÷ g/cm³), and add an allowance for cushion—often 5–15% depending on stability needs. If you’re supporting premium packaging, verifying with a short weight consistency study helps confirm the chosen cushion actually holds under production conditions.
Q: What’s different about calculating shot size on extra-large plastic machines compared to smaller presses?
A: The math is the same, but the consequences of being far off are larger. Extra-large barrels can create long residence times when the shot is relatively small, which raises the risk of material degradation, odor, and cosmetic defects. That’s particularly relevant for food packaging components used in high-end gift products, where appearance and neutrality (no off-odors) matter.
Q: How much cushion should I leave when setting the machine shot?
A: A common working range is around 5–15% of the required shot volume, but the “right” cushion depends on the part, resin, and gating. Large-format packaging parts with long flow lengths may benefit from a cushion that supports stable packing and repeatable transfer. The goal is a cushion that stays consistent cycle to cycle, not the smallest cushion you can get away with.
Q: Can Gourmet Biscuit Creations Ltd. help if my issue is packaging, not the biscuits?
A: Yes—because packaging performance directly affects biscuit quality in transit and on the shelf. Our premium biscuit programs often involve custom trays, inserts, and gift-ready structures, so we routinely collaborate with packaging partners on specifications, fit, and production readiness. That collaboration helps prevent the common late-stage surprises: warped inserts, broken product during shipping, or presentation issues at unboxing.
Q: What’s a practical way to get started if I’m developing a new premium gift box with molded inserts?
A: Start by gathering the basics: target part weight or CAD volume, resin choice (or short list), cavity count, and whether you’re using cold runner or hot runner. With that, you can estimate required shot and check whether the planned press size makes sense. If you’re building a biscuit line at the same time, Gourmet Biscuit Creations Ltd. can review the packaging concept alongside product fragility, pack-out workflow, and quality expectations so the final system scales smoothly.
Related Links and Resources
For more information and resources on this topic:
- Gourmet Biscuit Creations Ltd. Official Website – Visit Gourmet Biscuit Creations Ltd.’s official website to learn more about our premium biscuit manufacturing, OEM/ODM support, and packaging-ready product development approach.
- Society of Plastics Engineers (SPE) – A leading professional organization with technical resources and education that help contextualize processing fundamentals like shot size, residence time, and process stability.
- Plastics Technology (PTOnline) – Practical articles and processing guidance from industry experts, useful for understanding how shot size interacts with cushion, transfer, and consistency in injection molding.
- CAMPUS Plastics – Material data and technical information that can help you check density values and processing notes when converting between shot weight and shot volume.

 By
By